
We’ve observed an uptick in interest in Geolocation Storytelling. We’ll revisit the subject for those who know little about this medium as well as those who either want to design a project on paper (i.e. Word) or who want to go all the way and use the LodeStar Authoring tool to complete a working project.
To reach all audiences at some level, this article starts from the general and ends with the specific. Hop on and off at any point.
Introduction
Every place hides its own unique, rich story. Have you visited an unfamiliar town or area and wondered about its history, geography, and points of interest? Have you ever wanted to connect to a place on a level deeper than a quick drive-by?
A new form of storytelling—geolocation storytelling—combines technology and traditional storytelling to connect visitors at a deeper level. With the help of an app, the place where you’ve entered or visited on a map suddenly comes alive with narrative and imagery. You may hear about the past or be guided to an unusual rock formation or the vantage point of a famous painter. Geolocation stories can work on-site, guiding you from point to point or they can help you discover a place from the comfort of your home. Geolocation stories can be both informative and entertaining. They can involve the visitor in discovering why a place got put on the map, or solving a challenge, or even solving a murder mystery. In short, geolocation stories can be about anything that piques the visitor’s interest about a place.
The Inspiration
Places inspire people to learn more about them.
A group of history buffs, known as Lensflare Stillwater, were inspired by the many untold stories of Stillwater, a Minnesota river town. Stillwater was a lumber town with connections to Minnesota and Wisconsin pine lands by river and connections to Saint Paul by stage road and later by rail.
Stillwater inspired a number of geolocation stories. The first stories were guided tours of Stillwater’s historical downtown. A subsequent story helped cyclists learn about the rich history from the vantage point of a bicycle trail. Even later, another story recovered the lost memory of Stillwater’s streetcars.
Thousands of miles from Stillwater, a geolocation project told the story of Vincent Van Gogh’s year in Arles, France, and what went horribly wrong for him. Its authors first visited Arles to learn more about Van Gogh but were disappointed in the local tour booklets, which didn’t sufficiently tell the story.
If your town or place has points of interest, a rich history, or geographical features, you will want to consider creating a geolocation story to help others see the place from a new point of view. Visitors can walk to the specific places of interest and hear audio, see imagery, read text, scroll through time lines and learn more about this special place.
How it works
Typically the visitor launches a geolocation story (a web-based application) from a web address on a smartphone. The first page of the story provides instructions and a starting point. When the visitor reaches that point, she crosses an invisible geofence. Geofence is a just a metaphor. Actually, the visitor’s location is calculated from the signals of three or more satellites . Most modern smartphones are equipped with the hardware to detect these signals. Global positioning satellites constantly emit signals. The GPS receiver in the visitor’s phone listens for these signals. Once the receiver calculates its location from these satellites, it provides that information to the application. The logic of the application is constantly checking to see if the location matches a place of interest. If yes, then content in the form of audio, text and imagery is called up and presented.
Getting more specific: Best practices
If you already understand the power of the geolocation story and wish to get started, you’ll want to consider a few things. These are not hard and fast guidelines. As we gain more and more experience, we’ll learn about what works and what doesn’t.
- First, geolocation storytelling works best when the audience is on foot and out of doors. Smartphones can’t receive satellite GPS signals from inside of buildings. The technology works best outside with clear line-of-sight to the sky.
- Geolocation projects must be housed on a website that supports HTTPS. Smartphones don’t reveal their locations to applications that run from websites that begin with http:// The web address must be https:// The ‘s’ means secure. Information that is transported by HTTPS is encrypted in order to increase security of data transfer.
- There is a limit to the distance that people will walk on a tour or the length of a tour in time. Limit yourself to two miles completed within one hour. Of course, this is a very loose rule of thumb. Consider your audience when setting the limits. Young adults will have no difficulty with 3 – 5 mile hikes. Time and attention span, however, will remain a factor. Senior citizens with mobility issues will find two miles too long. The steepness of the terrain will be a factor. Use your discretion but keep it as short as possible.
- Some people’s interest may wane quickly. A two mile tour should have at least a dozen points of interest. Limit the distance and length of time between geolocation points.
- Present narrations in audio and text formats. People like to hear a recorded narration but, without headphones, the narration could easily be drowned out by traffic or a rushing river. On the flipside, audio narration often works in situations (e.g. bright sun) where the screen is difficult to see. You’ll need to use your judgement.
- Consider the format of the tour. Will you guide your audience from point to point or will you cluster points so that the audience will simply wander about and come upon points of interest?
- Audio should be cleanly recorded. The audience should not hear background noise or a muffled narration.
- Text must be spelled correctly, grammatically correct and short.
- Favor more points of interest and shorter narration/text rather than fewer points of interest and narration that drones on.
- Have fun creating this story. You’ll learn a lot!
Get your Geolocations
Even if you’re starting with Word to capture your text, find the locations. You can use Google Maps. This is a very accurate way of finding locations. For example, if I wanted the location of the intersection of Myrtle and Water Streets in Stillwater, I would do the following:
- Go https://www.google.com/maps
- Search for Myrtle Street, Stillwater.
- Move the map to the location of interest.
- Click on the intersection.
- Either write down the location coordinates or click on them. The coordinates will now appear in the address field at the top and can be copied and pasted into your Word document or directly onto a LodeStar page (see below).

About the Location Coordinates
In the example above the coordinates were 45.056745,-92.805510. The first coordinate (45.056745) is the latitude. The second coordinate is (-92.805510) is longitude. Always use a coordinate with six digits of precision (six digits to the right of the decimal point). The six digits will ensure an accuracy within a few inches but never rely on that. In other words, allow the technology a slop factor. Use precise coordinates but allow for imprecision in the ability of device to calculate its location. Never create a geolocation story that relies on an accuracy of a few inches. You control this by typing in numbers in the latitude and longitude proximity fields. The numbers spell out how close one needs to be to the precise location to trigger an event. In our geolocation stories we trigger something (e.g. show content) when the user is within 25 to 50 feet of a location. We call that crossing the geofence. The minus sign is important. In latitude, the minus sign denotes the southern hemisphere (south of the equator). In longitude, the minus sign denotes west of the prime meridian (Greenwich) and east of the antemeridian (roughly where the international date line resides).
If you want to grab your location while physically on the spot, use your smartphone’s Google Maps app.

- In Google Maps, click on the arrow to show your current location.
- Scroll down until you find the marker and the location. See screenshot below.
- Copy and paste the coordinate into your notes so that you can transfer the coordinate to LodeStar.

Preparing a Geolocation Story in Word
Your role might be to prepare the content. When you’ve completed the preparation, you can hand off the content in the form of a Word file. In Word, each location should be on a separate page. At the top of each page, key in the title and the latitude and longitude coordinates of the location. Add your text, graphics, image and narration. If your version of Word doesn’t support audio narration, use a free tool like Audacity to generate an MP3 audio file.
Even More Specific: Authoring a Geolocation Story with LodeStar
To create a geolocation tour in LodeStar, do the following:
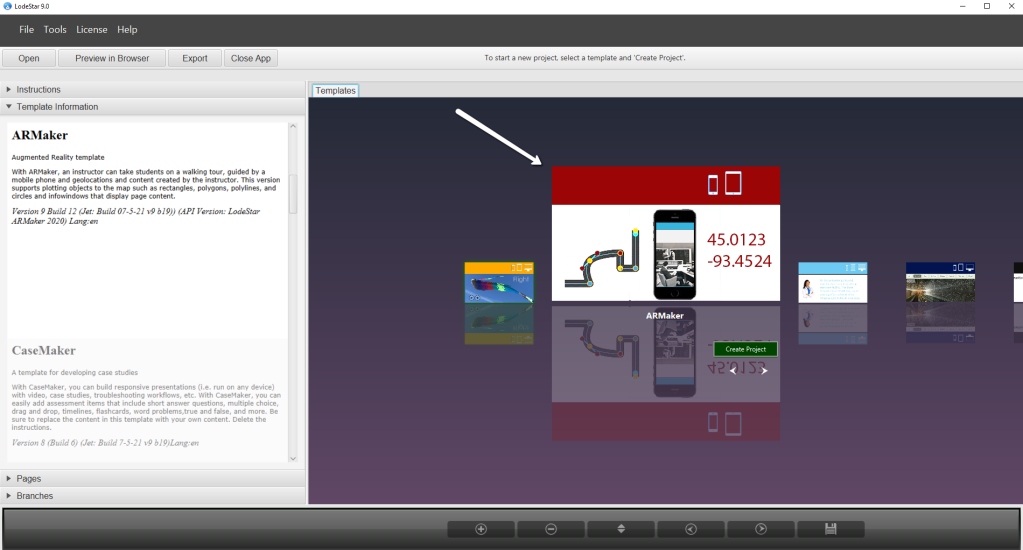
Launch LodeStar and select the ARMaker template. (AR stands for augmented reality.)
- Title your project. The project will now reside on your hard drive in a folder with the same title. It will be found in the LodeStar/Projects/[your title] directory.
- Add your title to the first page.
- Add a page by clicking on the + button at the bottom of the app.

- Ensure that the new page is a Text Page Type. Examine the screenshot below. The page should have a place to enter a latitude and longitude.
- Add your content. You can insert a widget (e.g. Image Layout Widget), text, audio, and more.
- Add a page to add more content.
- Then Preview in Browser (find button at the top).
- When you are ready to publish, Export as a SCORM 1.3 package and import to a Learning Management System or simply copy the LodeStar/Projects/[your title] directory to a web server.
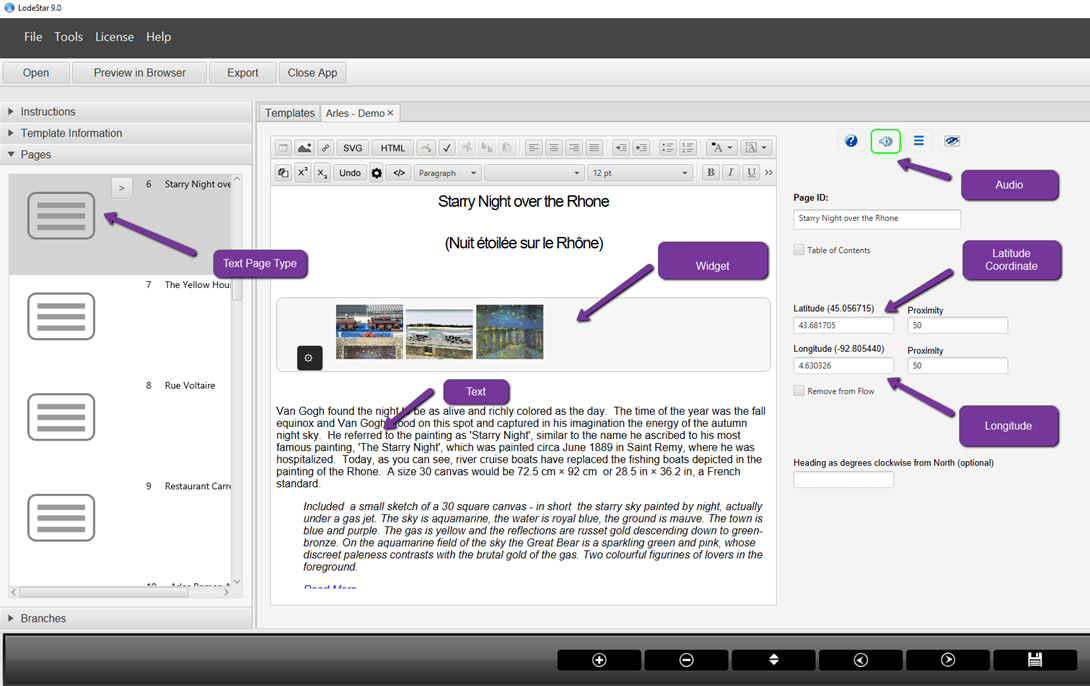
Below is what this page looks like in Preview. Notice the audio control at top left and the Show Map at the top left. Notice the navigation buttons top right (depending on layout). Notice the how the image slider appears, created by the PWG Image Slider Widget.

If your audience clicks on the ‘Show Map’ button, a Google Map appears with all of the locations marked with red markers. Again, each location represents a separate page in LodeStar.

Controlling the User Experience
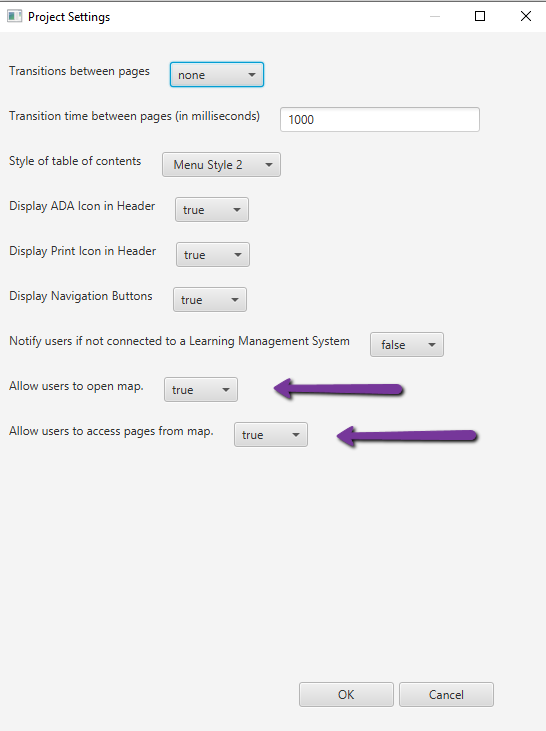
If you allow users both to show map and navigate to content by clicking on a marker, then you need not adjust project settings. If you want to restrict users’ access to the map and/or their ability to access pages of content from the map, select Tools > Project Settings. Change the settings according to your needs. (The important settings are marked with arrows. See screenshot below.)
Publishing your project
As a SCORM object
If you use a Learning Management System (LMS) and want to control access to your geolocation story, then, with your project opened in LodeStar, click on Export and export to SCORM 1.3. Go to your LMS and import the story as a SCORM object.
As a website
If you have access to a web server, copy the project folder to the web server and use the index.htm file in your URL. Once again, location services will only work on web servers that support https://
If you don’t have access to a web server, then read the following article that explains how you can use GitHub as a web server.
Alternatively, you can use Site44 to convert your Dropbox folder to a published website:
(We are not endorsing Site44 but LodeStar Learning has successfully used it on a number of projects.)
As an Open Education Resource (OER)
Publish the geolocation story as a web site, then register the URL (address) of that site with OER Commons, Merlot, or whatever OER repository you prefer.
Additional Details
If you are new to Geolocation Story-telling to learn more detail, visit:
Geolocation Storytelling: Van Gogh In Arles | LodeStar Web Journal (wordpress.com)
To see an example of a finished product as OER, visit:
https://www.oercommons.org/courses/vincent-van-gogh-s-arles/view
Or view the app at:
Van Gogh In Arles on the App Store (apple.com)
Conclusion
Geolocation stories are a great way to help visitors uncover the hidden wonders of place. Google Maps and the LodeStar Authoring tool are indispensable ways of authoring stories and publishing them either to Learning Management Systems or to the web.
If you complete a project, share your project. Drop a comment or drop a line to supportteam@lodestarlearning.com.


