Robert N. Bilyk
President, LodeStar Learning Corporation
Introduction
We want students to think. That’s the common refrain among educators. Ideally, we move students beyond the classroom and textbook and put them in situations where they apply their learning.
As instructors and trainers, we are also desperately strapped for time. We seek resources from publishers and Open Education Repositories but seldom find the challenging activity that helps students put it all together for our specific course and intended outcomes.
If we consider home-growing a ‘thinking’ activity, we are presented with a continuum of possibilities. In this discussion, we look at different types of activities along the continuum. In my next post, I’ll suggest a new type of activity that can be developed in a short time frame with skill that is within reach of instructors and trainers. I call it the State Response Engine. But for now, let’s look at the “Thinking Activities” continuum.
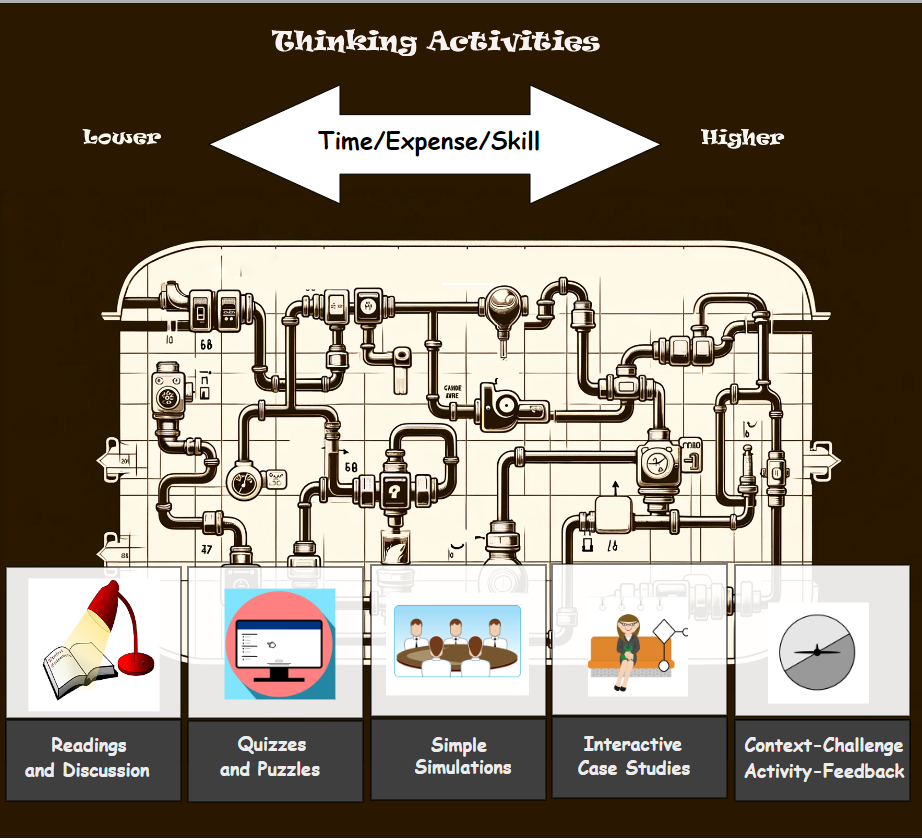
Thinking Activities Continuum
By continuum, I mean a sequence, series or system in which adjacent elements are not perceptibly different from each other, although the extremes are quite distinct.
In this case the continuum represents categories of learning experiences that promote thinking. The ends of the continuum (in this case, Readings and Discussion, and Context-Challenge-Activity-Feedback) seem extremely different but the activities in the middle vary imperceptibly at least in terms of the skill needed to design and develop them.
Reading and Discussions

On the easier end, we educators can assign readings. By easy, I mean technically easy. We know our content, or we can work with a subject matter expert. With a little ingenuity we can develop prompts to promote discussions, team-based problem-solving, role-playing and so forth. The technology can be as simple as a discussion board or a content page in a learning management system. The technology is easily mastered by instructors and trainers.
Quizzes and Puzzles

In addition to assigned readings and discussions, we can challenge trainees and students with multiple choice questions, true or false, fill-in-the blanks, matching, crosswords, word games and drag and drop exercises. This implies a new skill level that requires knowledge to construct these interactions and form good questions.
As Ben Clay wrote, “Technically correct and content-appropriate multiple choice and true-false test items require an extensive amount of time to write and revise.”1 This category can also include flashcards, quick knowledge checks, click-and-reveal, and other memory-recall exercises. There is a significant skill involved in developing memory games and good assessment items, to be sure. But on the technical side, instructors can quickly master their learning management system’s quizzing tool or choose a good authoring tool with templates.
However, our goal isn’t to prepare students to answer multiple choice questions. We want students and employees to assess their current situation, recall relevant concepts, principles, rules, and procedures and apply them to the situation. To be fair, in the view of the authors of Make it Stick 2, it’s important for students ‘to get it out in order to get it in’ – to make it stick. Any recall activity is helpful in that regard. But, in my view, we need additional strategies to simulate real-world situations to help students draw from their knowledge and apply it appropriately. And that’s why we progress to a higher level.
Simple Simulations

Further down the continuum we have simple simulations such as Clark Aldrich’s ShortSim3 that I’ve written about in the past. The technical difference and the skill involved is almost imperceptible from developing online MCQ assessments.
If an instructor can use an authoring tool and devise multiple choice questions, fill-in-the-blanks and so forth, then they will be able to do the things needed for a ShortSim. And that is, write narrative, add graphics, present decision options, advance the narrative. Related to the latter, the instructor can choose a linear path or branch. Branching allows students to experience something different as a consequence of their decisions. Authoring systems like LodeStar, Captivate, StoryLine and BranchTrack make it relatively easy to set up branches. But it is a new skill level and it takes a little time to master.
This category can also include simple virtual tours, which require branching and media like 360-degree panoramas and Photospheres.
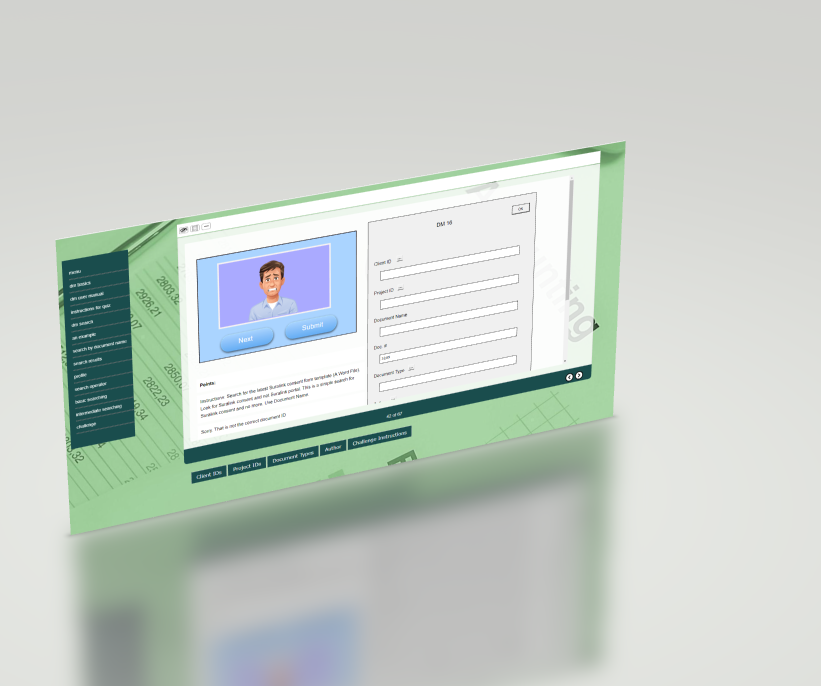
Interactive Case Studies

Interactive case studies help students put their knowledge into practice. They help students develop the ability to analyze, judge, and make decisions. Interactive case studies often include information that a student must consult to make the right decision. In nursing, the information might come from a simulated electronic health record. In economics, it might include a Dow Jones Index for a given time period.
Akin to interactive case studies, decision-making scenarios display content and test the knowledge of learners by challenging them to make decisions and observe the consequences. Each screen presents new situations and new choices.
In a lesson on patient management, the student is stepped through the patient history, an initial evaluation, physical examination, patient report and diagnosis. The student is evaluated on time and budget management and on patient care management.
The interactive case studies and decision-making scenarios that belong to this category are highly developed. They might include multiple resources, graphs, charts, fact sheets, data sets, videos, biographies, etc. They may include people to interview and glean information from. They may include programmatic branches that send students down instructional paths based on the choices they made.
Technically, interactive case studies and decision-making scenarios are just a step up from a ShortSim. They involve more time and effort in deciding the level of detail and developing all of the resources to immerse the student in the case or decision-making situation. In the Patient Management example, the additional technical challenge is in presenting an animated graphic that shows the student’s performance in time and patient management. The Patient Management lesson now requires us to store student performance data in variables and then control a graphic based on the variables.
This category can also include interactive fiction/non-fiction, problem-based scenarios, historical case analyses, crisis management simulations, and role-playing scenarios.
Context Challenge Activity Feedback

Context, Challenge, Activity, and Feedback (CCAF) is a design model used to create interactive learning activities. Designers like Allen Interactions, Rivertown Communications, TrueUp, and KDG Interactive build media-rich CCAF-type activities that include not only graphics, animation, video, and other media but performance indicators, branched instruction, resources, coaching, and simulations – all beautifully illustrated and intended to immerse the student in a real-life context.
CCAF activities are generally free-form activities. They don’t appear to be produced from templates but represent an original treatment of an environment that sets the challenge for the learner. Underlying these treatments may be re-purposed models (interaction types) but the presentation doesn’t appear to be repurposed and template based.
This category can also include simulated experiments, virtual laboratories, software simulations, equipment operation simulations, process simulations.
Virtual Reality/Augmented Reality
Virtual reality and Augmented reality applications can span the entire continuum of thinking activities, but they require specialized knowledge. VR and AR can range from simple multiple-choice types of activities to simulations that are simple or quite sophisticated. Applying VR and AR to thinking activities requires knowledge of platforms such as Unity and 3D creation tools like Blender.
Conclusion
The Thinking Activities continuum represents the technical skill needed by a trainer or instructor to develop activities at different levels. At one end of the continuum, the instructor needs to be familiar with the learning management system to post discussions and collaborative problem-solving narratives. To create quiz items and different types of exercises like drag and drops and matching, the instructor must be familiar with either the native tools of the learning management system or an authoring tool like Storyline, Captivate or LodeStar. Then we get into the category of Simple Sims and the idea of branched instruction. That carries upward to interactive case studies and decision-making scenarios that present resources and media and show the consequences of decisions. Depending on the design, case studies and decision-making scenarios may introduce more sophisticated branching. At the highest level in terms of time/expense and skill are activities that follow the CCAF model. They often recreate real-world situations that blend media with branching logic and data.
The challenge for instructors and trainers is often time. Activities at the higher end of the continuum require more time to develop. Instructors and trainers are smart people. With today’s authoring tools, they can acquire the skills as they work their way from quizzes to short sims to interactive case studies. I’ve observed many instructors and trainers move along the continuum. But at some point, we all need a return on our investment of time or money. That ROI might be supported by the numbers of students that we teach or the significance of the skill in the curriculum. For example, the instructor might invest time in a project that helps students through a significant and known stumbling block. In math that might mean difficulty with word problems and translating real-world situations into mathematical equations. In chemistry, understanding chemical bonding. In computer science, understanding data structures and algorithms. In machining, the use of the sine bar and basic trig. In interpersonal relations, recognizing unconscious biases. Every subject has its stumbling points. Time invested in helping students through those stumbling blocks is time well invested.
From here
That brings us back to the midpoint of the continuum, which includes ShortSims. In my view we need to uncover and invent more types of activities that are easily within the technical reach of the intrepid instructor and producible in a short period of time.
I have developed several models that fit the bill. The next post will re-introduce the State Response Engine (SRE). The SRE randomly picks situations and then challenges students to choose the right responses or actions based on the randomly chosen situation. Here is a link to that post:
References
1 Clay, Ben “Is This a Trick Question”, 2001, Kansas Curriculum Center
2 Brown, R. M. (2014). Make it Stick. Brown, Roediger, McDaniel.
3 ShortSim is a term coined by Clark Aldrich in his book ShortSims
Aldrich, Clark (2020) ShortSims, CRC Press